Last week I made a post about my initial tests with RTKLIB and my experiences with getting an RTK fix over NTRIP. The system was able to get an RTK fix from a base station located about 250 miles away. While this was very imprecise with natural drift moving upwards of 5 meters, it did prove that I was at least on the right track. I ordered another GPS module and antenna which will let me set up another base much closer to home and hopefully fix this issue.
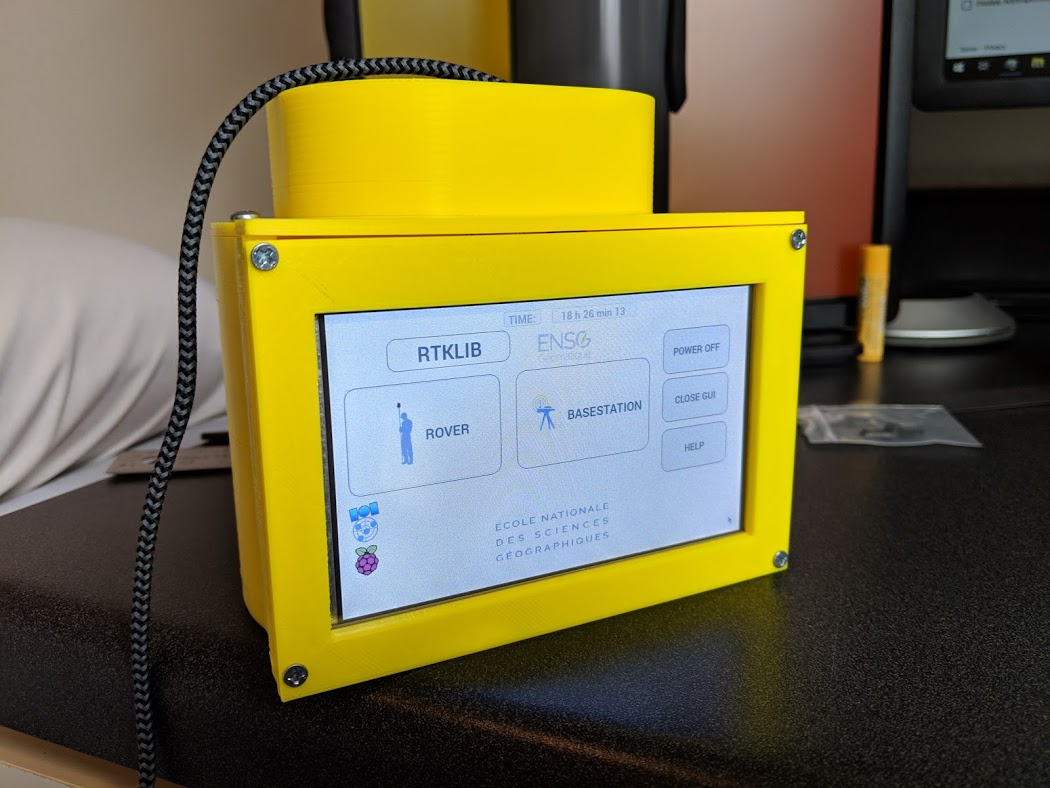
Since I am still waiting for parts to arrive for the new base, I had to put that off another week. In the mean time, I focused on getting RTKLIB working on a Raspberry Pi. At $35, the Pi 3B+ was a natural choice. It is a small, light weight, and very well supported single board computer only a little larger than a deck of cards. Combining it with a 5″ touch screen will also let me use it without a keyboard and mouse in the field.
Fortunately, someone else had already done a lot of the hard work of getting RTKLIB onto a Pi. This repository on GitHub will serve as the base for most of my build as it has a much better GUI for portable operation than the Demo 5 version of RTKLIB which is more suited to desktop use. I also used the 3D STL files from the repository to 3D print the same case seen in their directions.
After flashing the Pi with the precompiled version of RTKLIB GUI, I plugged in the GPS telemetry receiver to one of the USB ports and attempted to boot it. The pi however was not happy with its setup and started locking up and freezing. A few minutes of troubleshooting later, I realized that the telemetry module and Pi were drawing so much power that the USB power adapter was unable to sustain 5 volts consistently. A different adapter with a much higher amp rating fixed this issue.
Next up was getting RTKLIB configured to accept the incoming streams. The GUI wasn’t great for this function so I had to use a keyboard and mouse to do the initial setup. I configured RTKLIB to use the telemetry module as the rover input and configured it to use the uBlox protocol since the GPS module outputs in UBX format. Setting up the base was a similar process to the Demo5 version done in last week’s post. I am once again using the Auburn Hills correction site since I am waiting on parts to put up my own.

Packet counters for the various input streams. Input base is still set to correct off of the Auburn Hills station.

Main status screen
In the status screen above, you can see a lot of the basic information of the GPS system. This screen lets the user sync the system time to the GPS corrected time and how many satellites are in view of the base and rover. The screen also gives the option to save the current position to the end of its position log file. The position log file can be any file directory on the pi or a USB drive connected to the pi.

Menu for saving points
Initial tests are promising but I can see some potential issues with the GUI. It remains quite clunky and difficult to use with frequent freezes. I am also noticing that the GUI version has more difficulty getting an RTK fix when compared to the Demo5 version. This could be caused by an older version of RTKLIB that isn’t as well refined. The only way to tell is to wait for the new GPS module to arrive for local corrections.