In my previous post, I discussed the initial triage work I did with the CNC my professor gave me. It has a lot of shortcomings, some of which I will be addressing today by building a small case to prevent dust related issues and contain everything. I have also set up a Raspberry Pi with CNC.js to control the machine remotely so I can keep it in the garage where the noise won’t bother anyone.
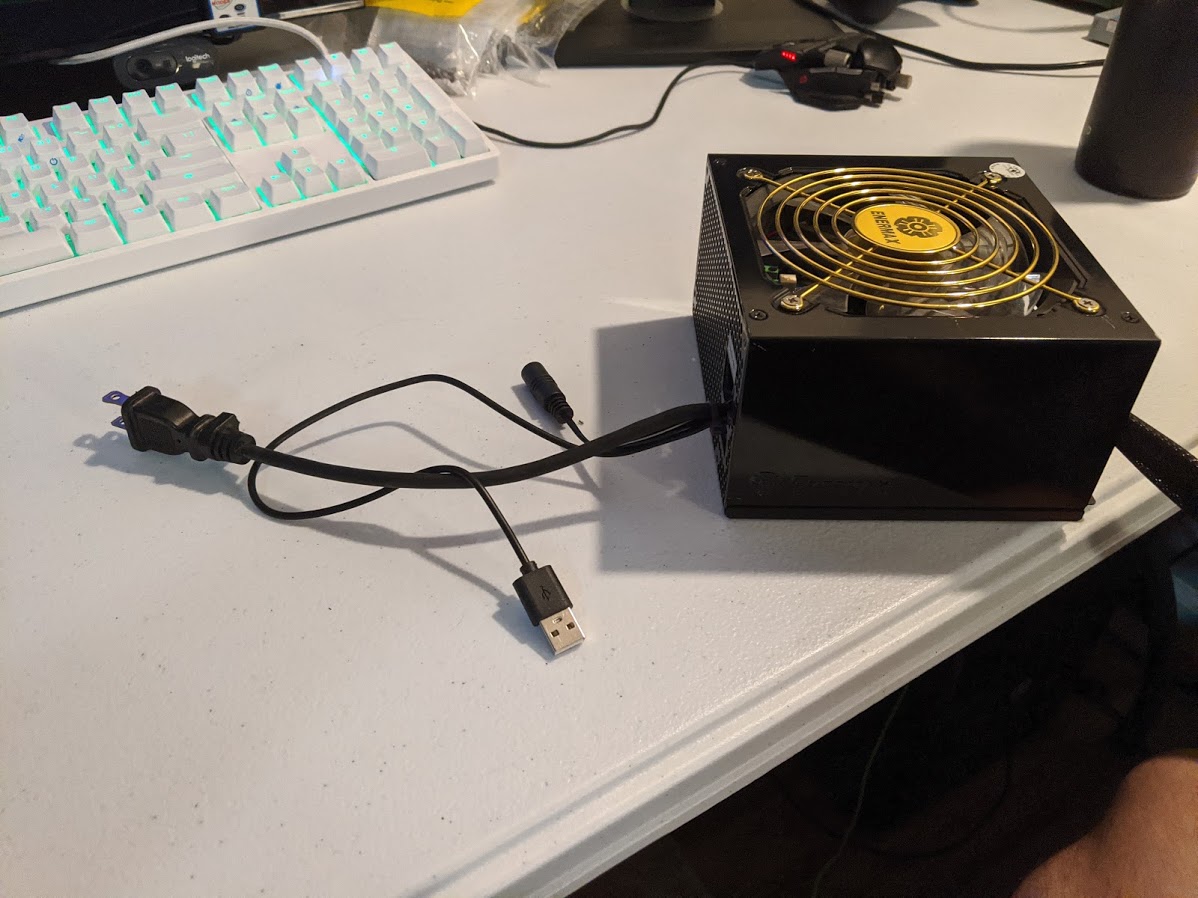
To start things off, I had to find a suitable enclosure to build inside. After searching around my room, I found an old computer power supply which would fit my requirements. It is just barely big enough to fit both the Raspberry Pi and the Arduino based CNC controller with a little bit of room to spare for the fan and wires.
When planning the layout of everything, I had to make a lot of decisions about which boards will need to be accessed more often. I don’t expect this case to be a long term solution, but I want it to be functional enough to keep the boards safe and have some grounding and insulation to prevent safety hazards.
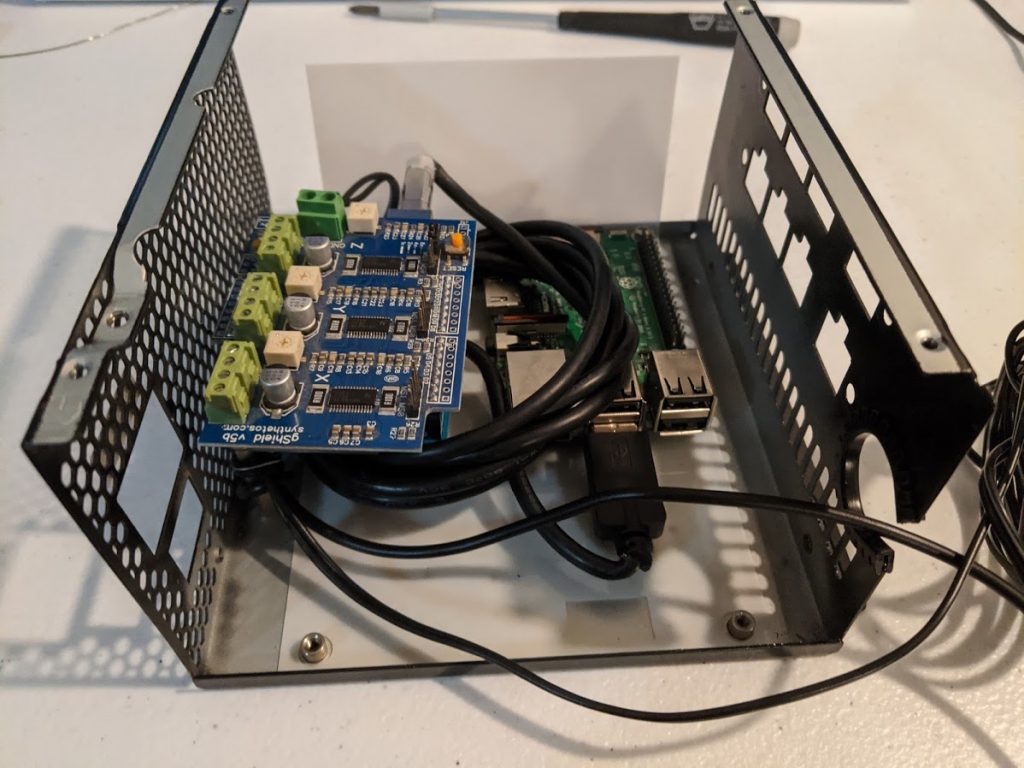
I eventually settled on a tiered configuration with the Raspberry Pi being bolted to the bottom of the case and the Arduino sitting on a pair of standoffs to raise it up to the top of the case. I also decided to leave the insulating sheet in the case from its previous use as a power supply since this will add an extra layer of safety from potential shorts. The wires were bundled up together in the case to make more space for the additional cables that will be added when I wire the stepper motors up.
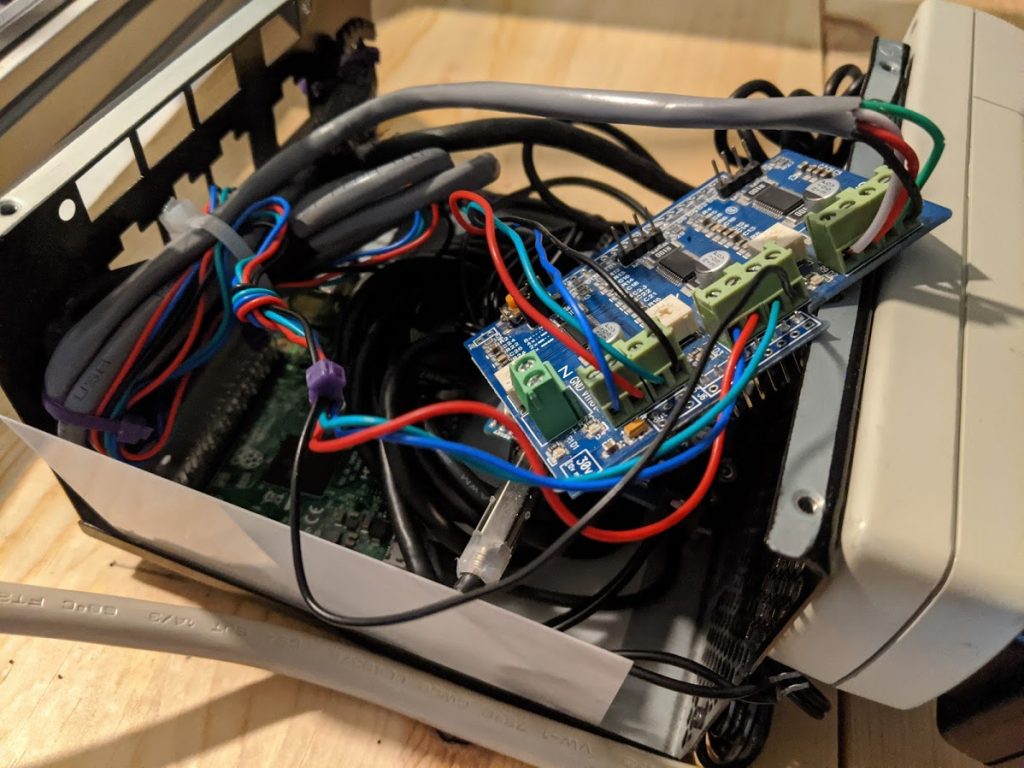
The image above shows the CNC control shield sitting outside of the case. I can get easier access to the terminals by simply removing the shield from the Arduino, attaching the stepper motor wires, and plugging the shield back into the Arduino.On the right side, the power strip I mounted to the side of the case can also be seen. This allows me to power the whole machine from one outlet without adding to the already chaotic bundle of wires. I don’t particularly like this solution, but it works and will likely only be a temporary mounting position as I plan to build an enclosure around the entire CNC to capture dust. When I do that I will likely add a compartment for wiring and other components that are necessary to the machines functionality.
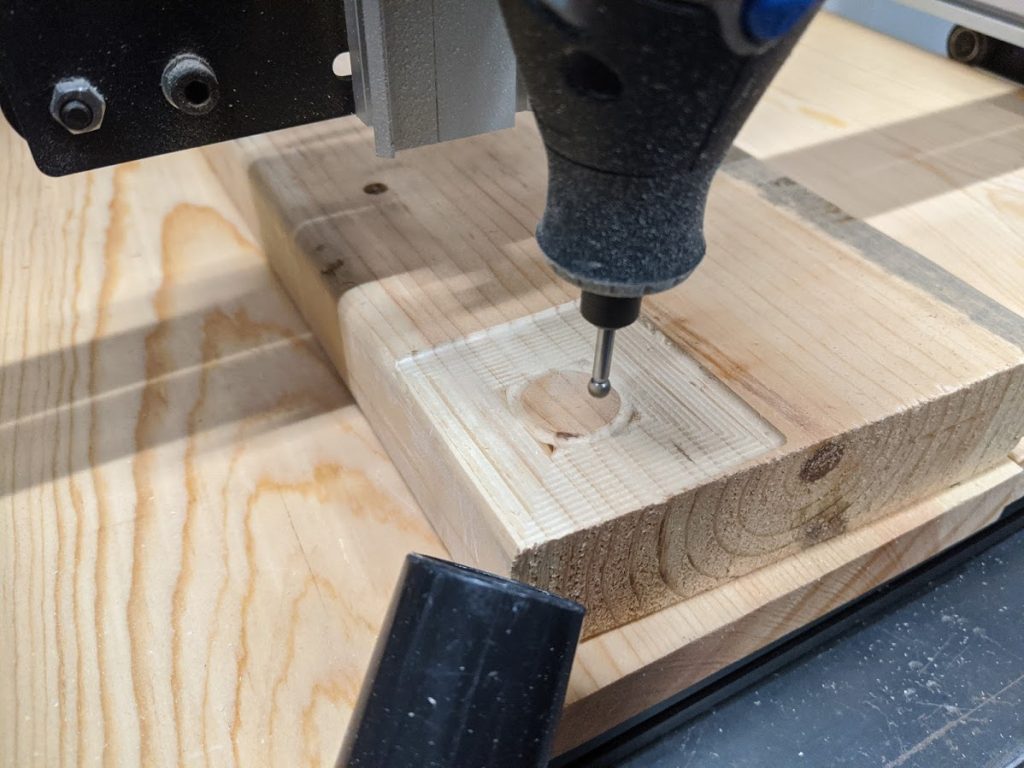
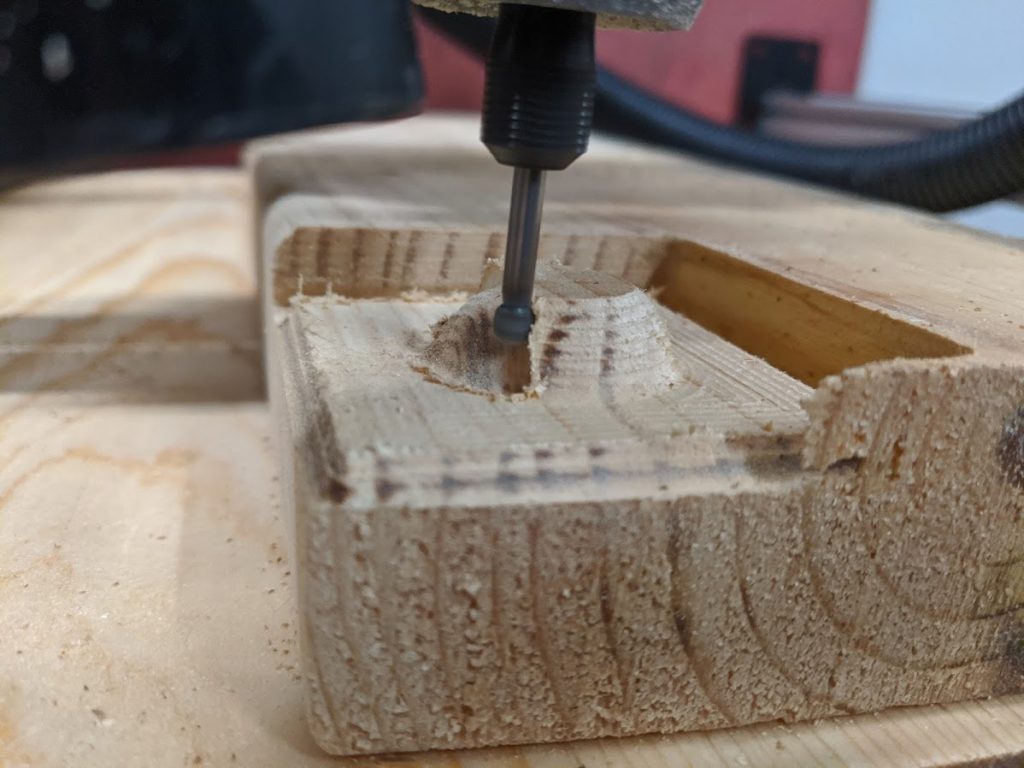
With the enclosure fully assembled, I decided to do a test cut. In the above images, I decided to design a very basic part consisting of a plate with a half sphere in the middle. I chose a ball mill since I wanted to test the machines ability to perform 3D milling operations and it worked relatively well. The machine did something to my feedrate though which resulted in burning of the wood. I need to investigate this further as I suspect GRBL, the firmware running on the CNC controller, has a maximum feedrate programmed which is throwing all of my feeds and speeds calculations off.
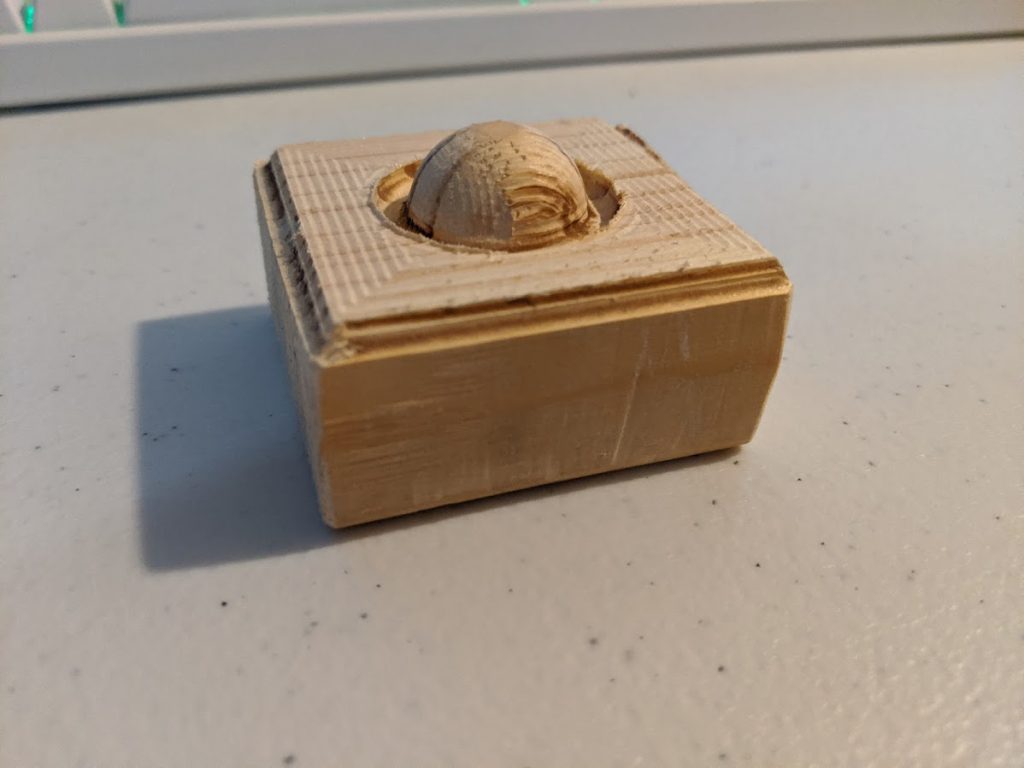
The results are about what I expected from a machine in this price range. It managed to skip a step in the Z axis at some point, making me have to cancel the operation before it could completely machine the part. I will have to investigate this further as it will cause issues if it continues to happen. I also want to swap the Dremel out for a spindle which is capable of machining with larger tools as 1/8″ tools are rather small and difficult to work with for large projects.